“What’s the best Slider plugin for GeneratePress” and “When is GenerateBlocks adding a carousel element?” — I see this and similar questions almost weekly in the GP community. Truth is, you don’t need either. I’ll show you how to build clean, performant sliders and carousels using just two GenerateBlocks containers and Flickity – a proven JavaScript library you probably already know.
What makes this approach perfect for GeneratePress sites is its simplicity: initialize Flickity directly in your container’s HTML attributes, and you’re done. No extra JavaScript needed. While alternatives like Splide or SwiperJS are solid choices too, Flickity’s simple HTML structure and initialization makes it particularly neat for GenerateBlocks implementations.
In this tutorial, we’ll set up everything in under 15 minutes, keeping your site lean and fast. No plugins, no jQuery, no mess.
Step 1 — Enqueue Flickity Files
Let’s start by adding Flickity’s files to your site. Add this code wherever you manage your scripts – I use a WPCodeBox, but the functions.php in your GeneratePress child theme works just as well. Only enqueue this on pages where you actually use sliders to keep your website lightweight.
function enqueue_flickity() {
    wp_enqueue_style('flickity', 'https://unpkg.com/flickity@2.3.0/dist/flickity.min.css', array(), '2.3.0');
    wp_enqueue_script('flickity', 'https://unpkg.com/flickity@2.3.0/dist/flickity.pkgd.min.js', array(), '2.3.0', true );
}
add_action('wp_enqueue_scripts', 'enqueue_flickity');
Step 2 — Set Up the Container Structure
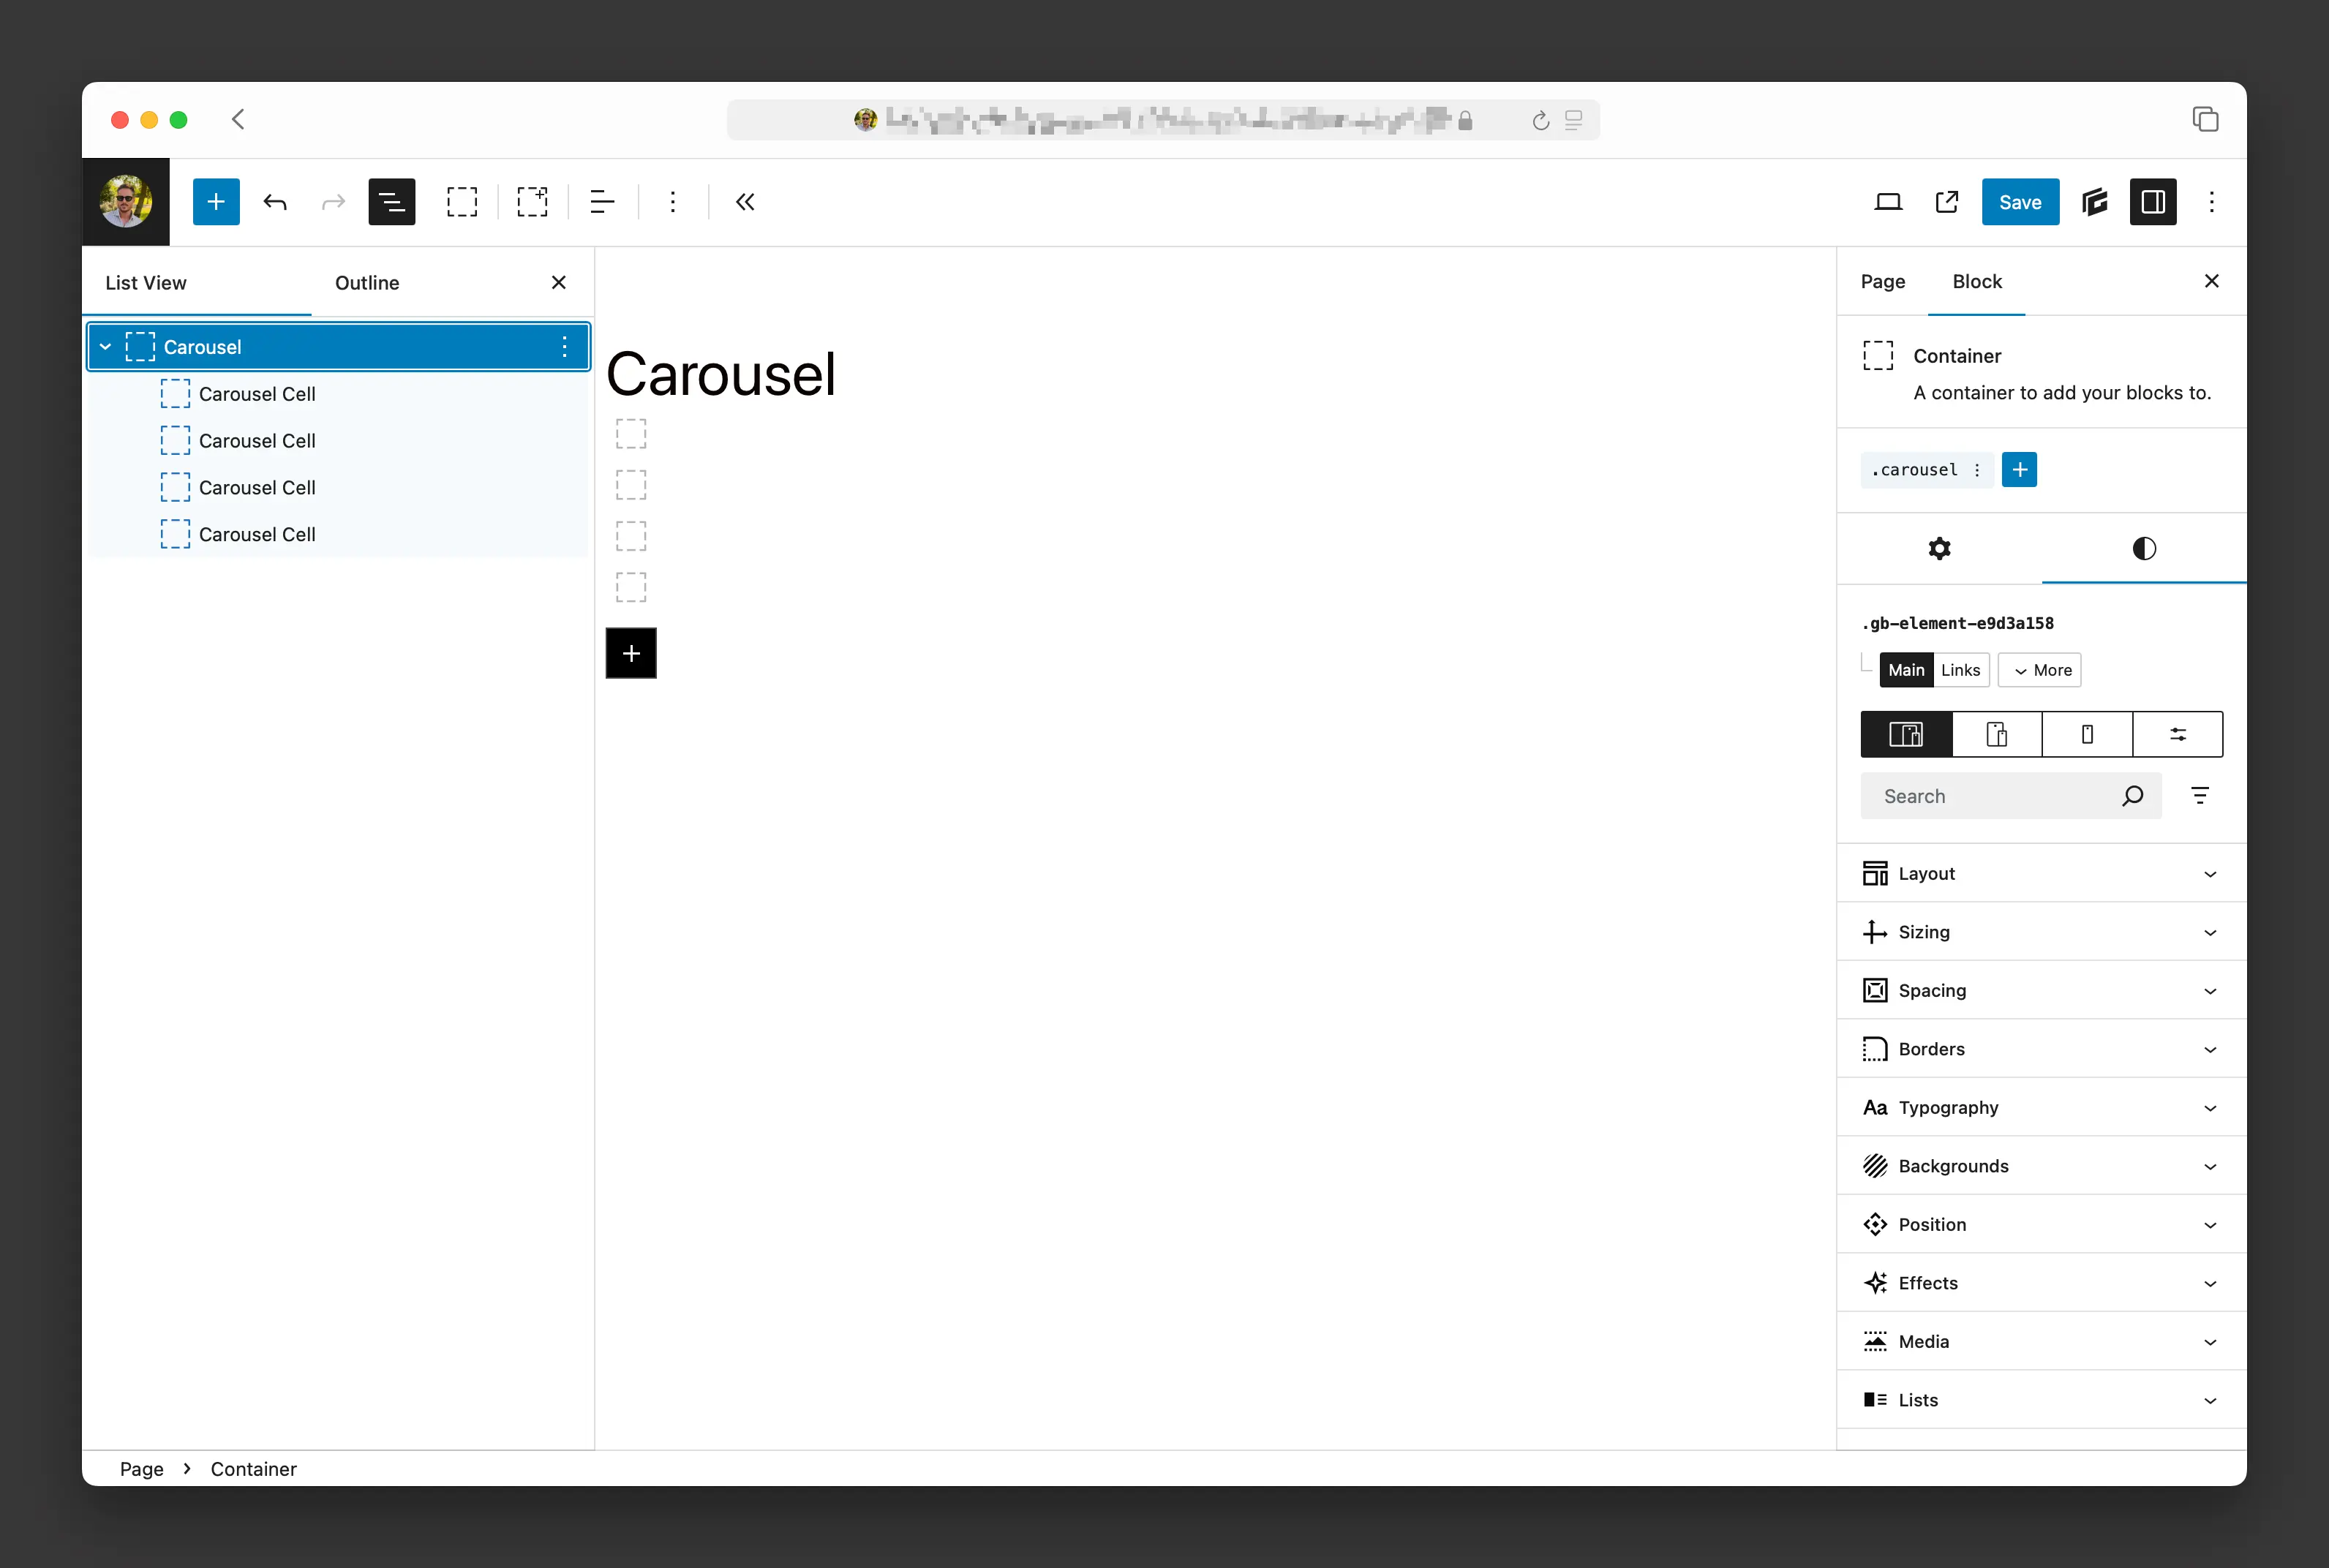
For the structure of the carousel, we’ll use GeneratePress Container Elements with this straightforward pattern.
<div class="carousel" data-flickity="{ "cellAlign": "left" }">
  <div class="carousel-cell">...</div>
  <div class="carousel-cell">...</div>
  <div class="carousel-cell">...</div>
  ...
</div>
Add a Container block with a class for the carousel (I use .carousel) and inner container elements for the cells (I use .carousel-cell). The class names aren’t strict, you can use whatever works for you. Here’s the basic structure we’re aiming for:

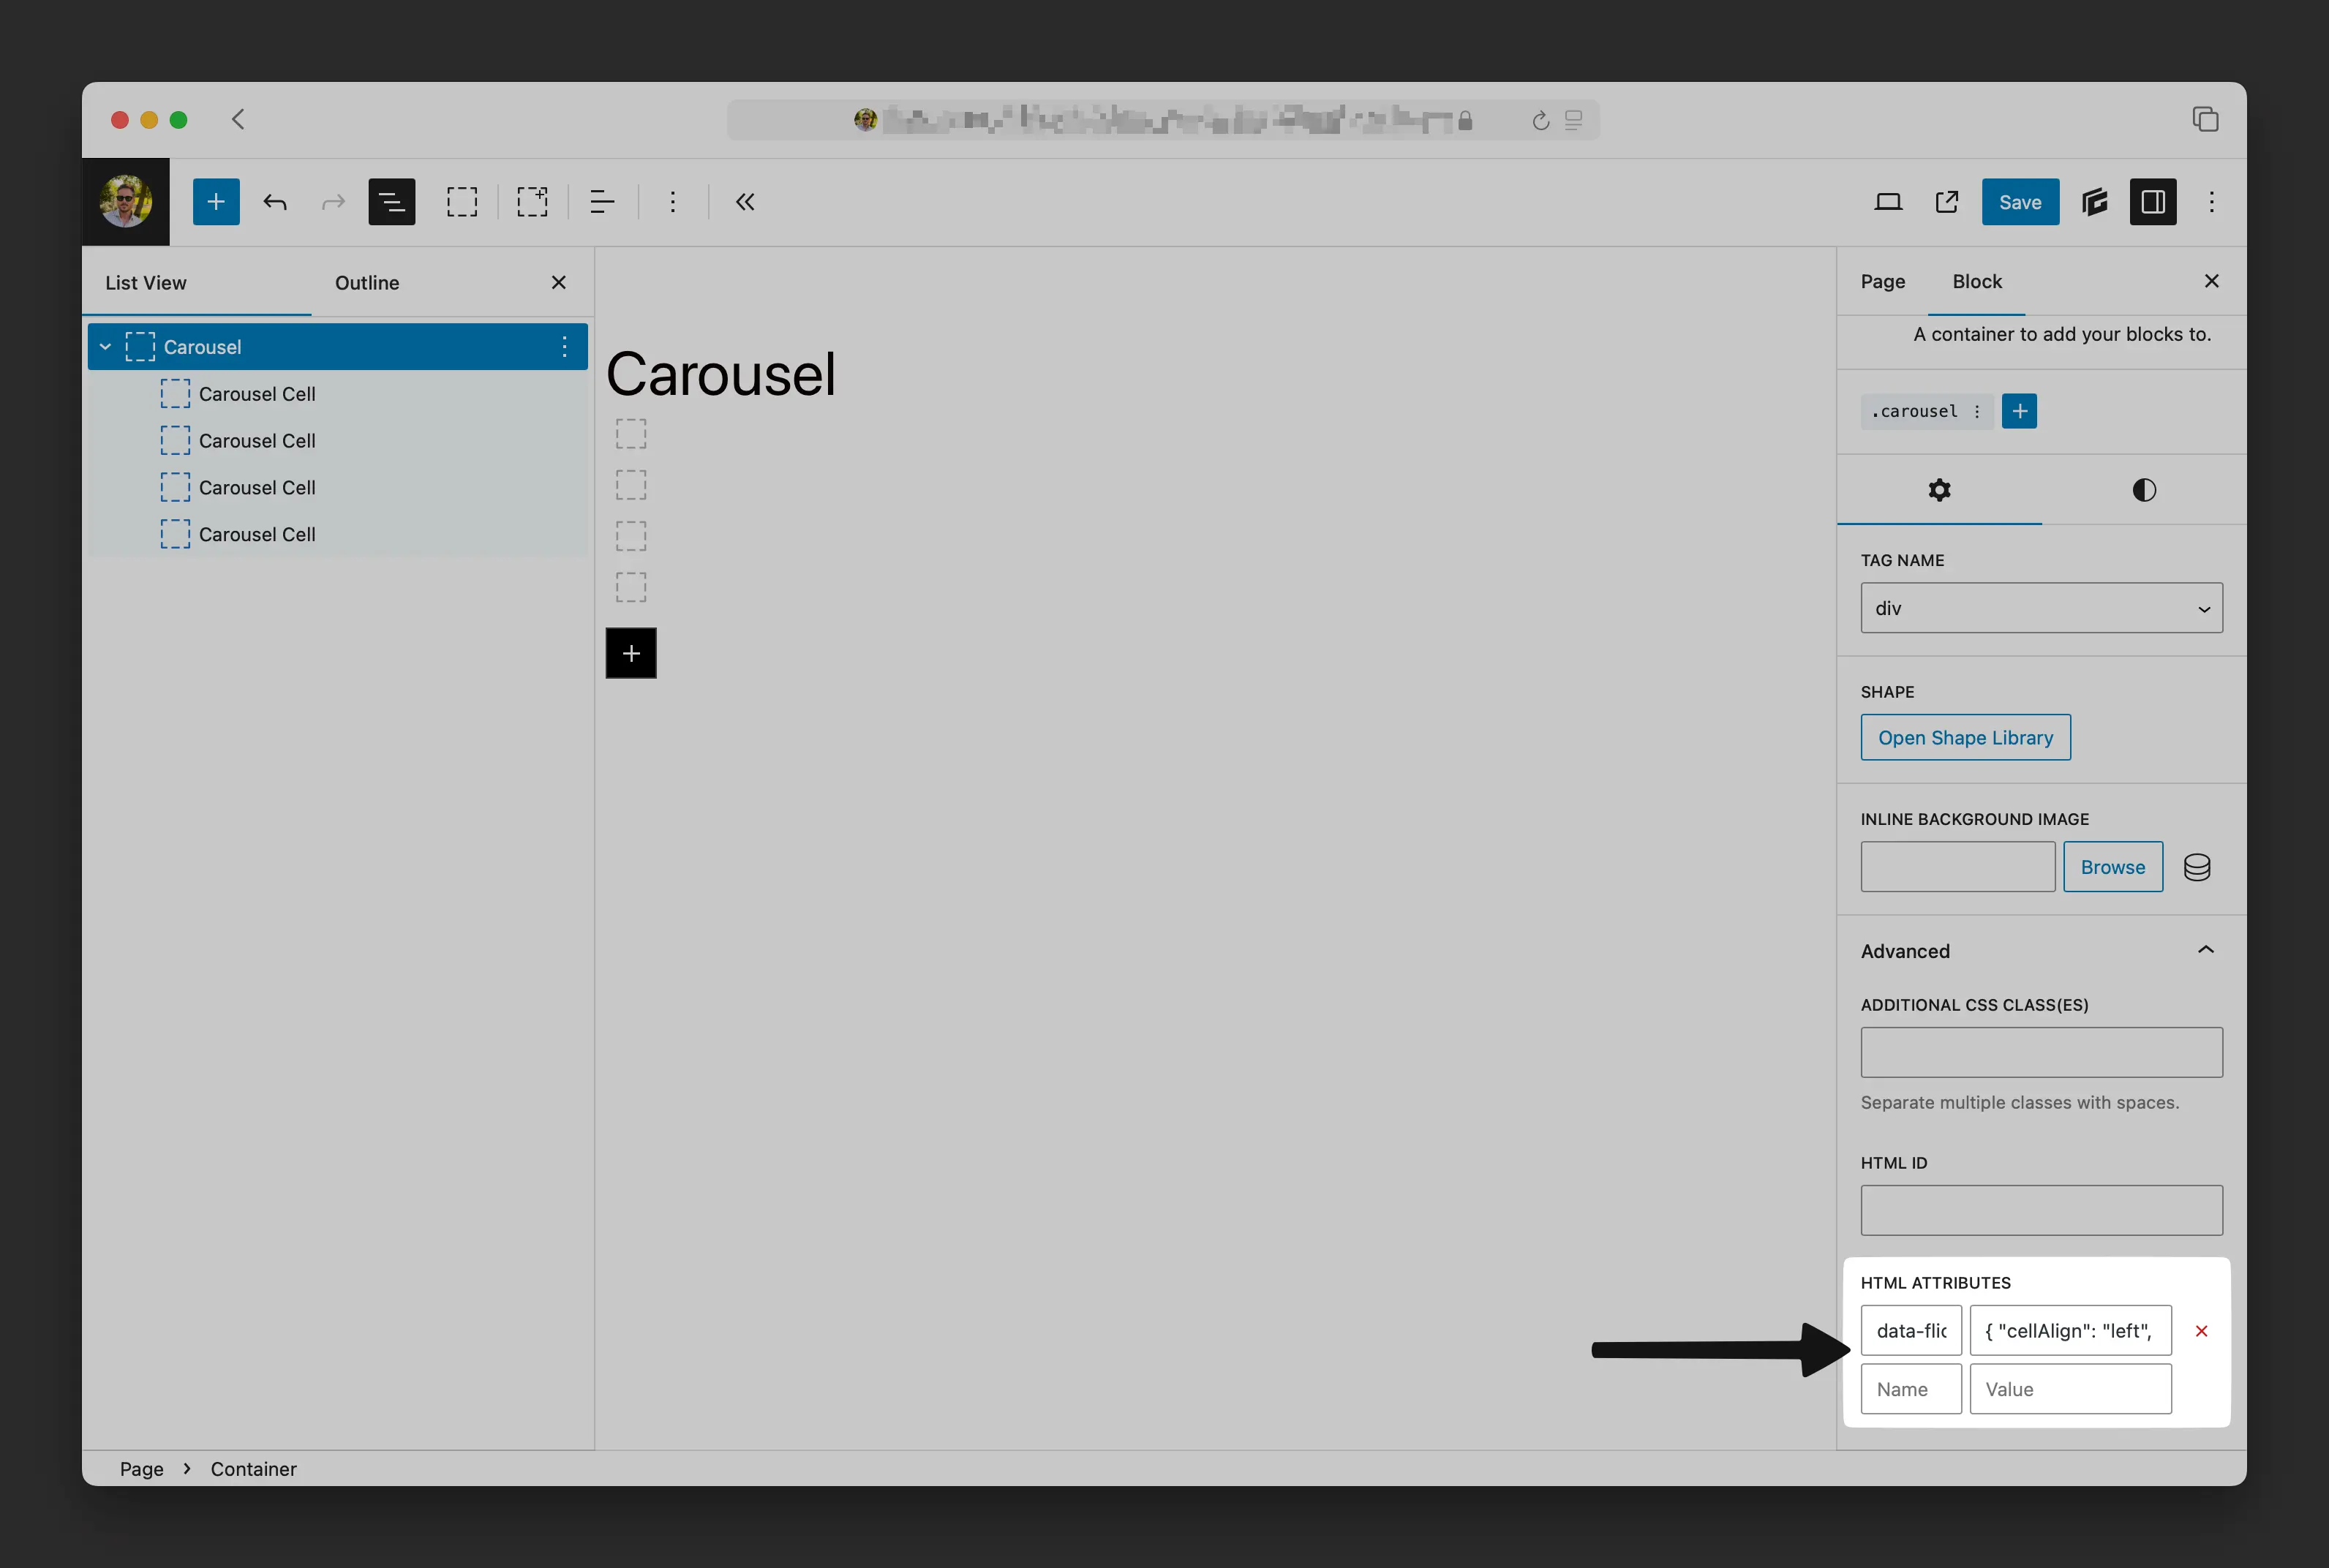
Initializing your carousel is as simple as adding the data-flickity attribute to the outer container (in my case .carousel). Options can be set in its value and must be valid JSON. Keys need to be quoted, for example "cellAlign". No separate JavaScript initialization files needed, that’s basically it!
<div class="carousel" data-flickity="{ "cellAlign": "left", "contain": true, "groupCells": true, "wrapAround": false }">
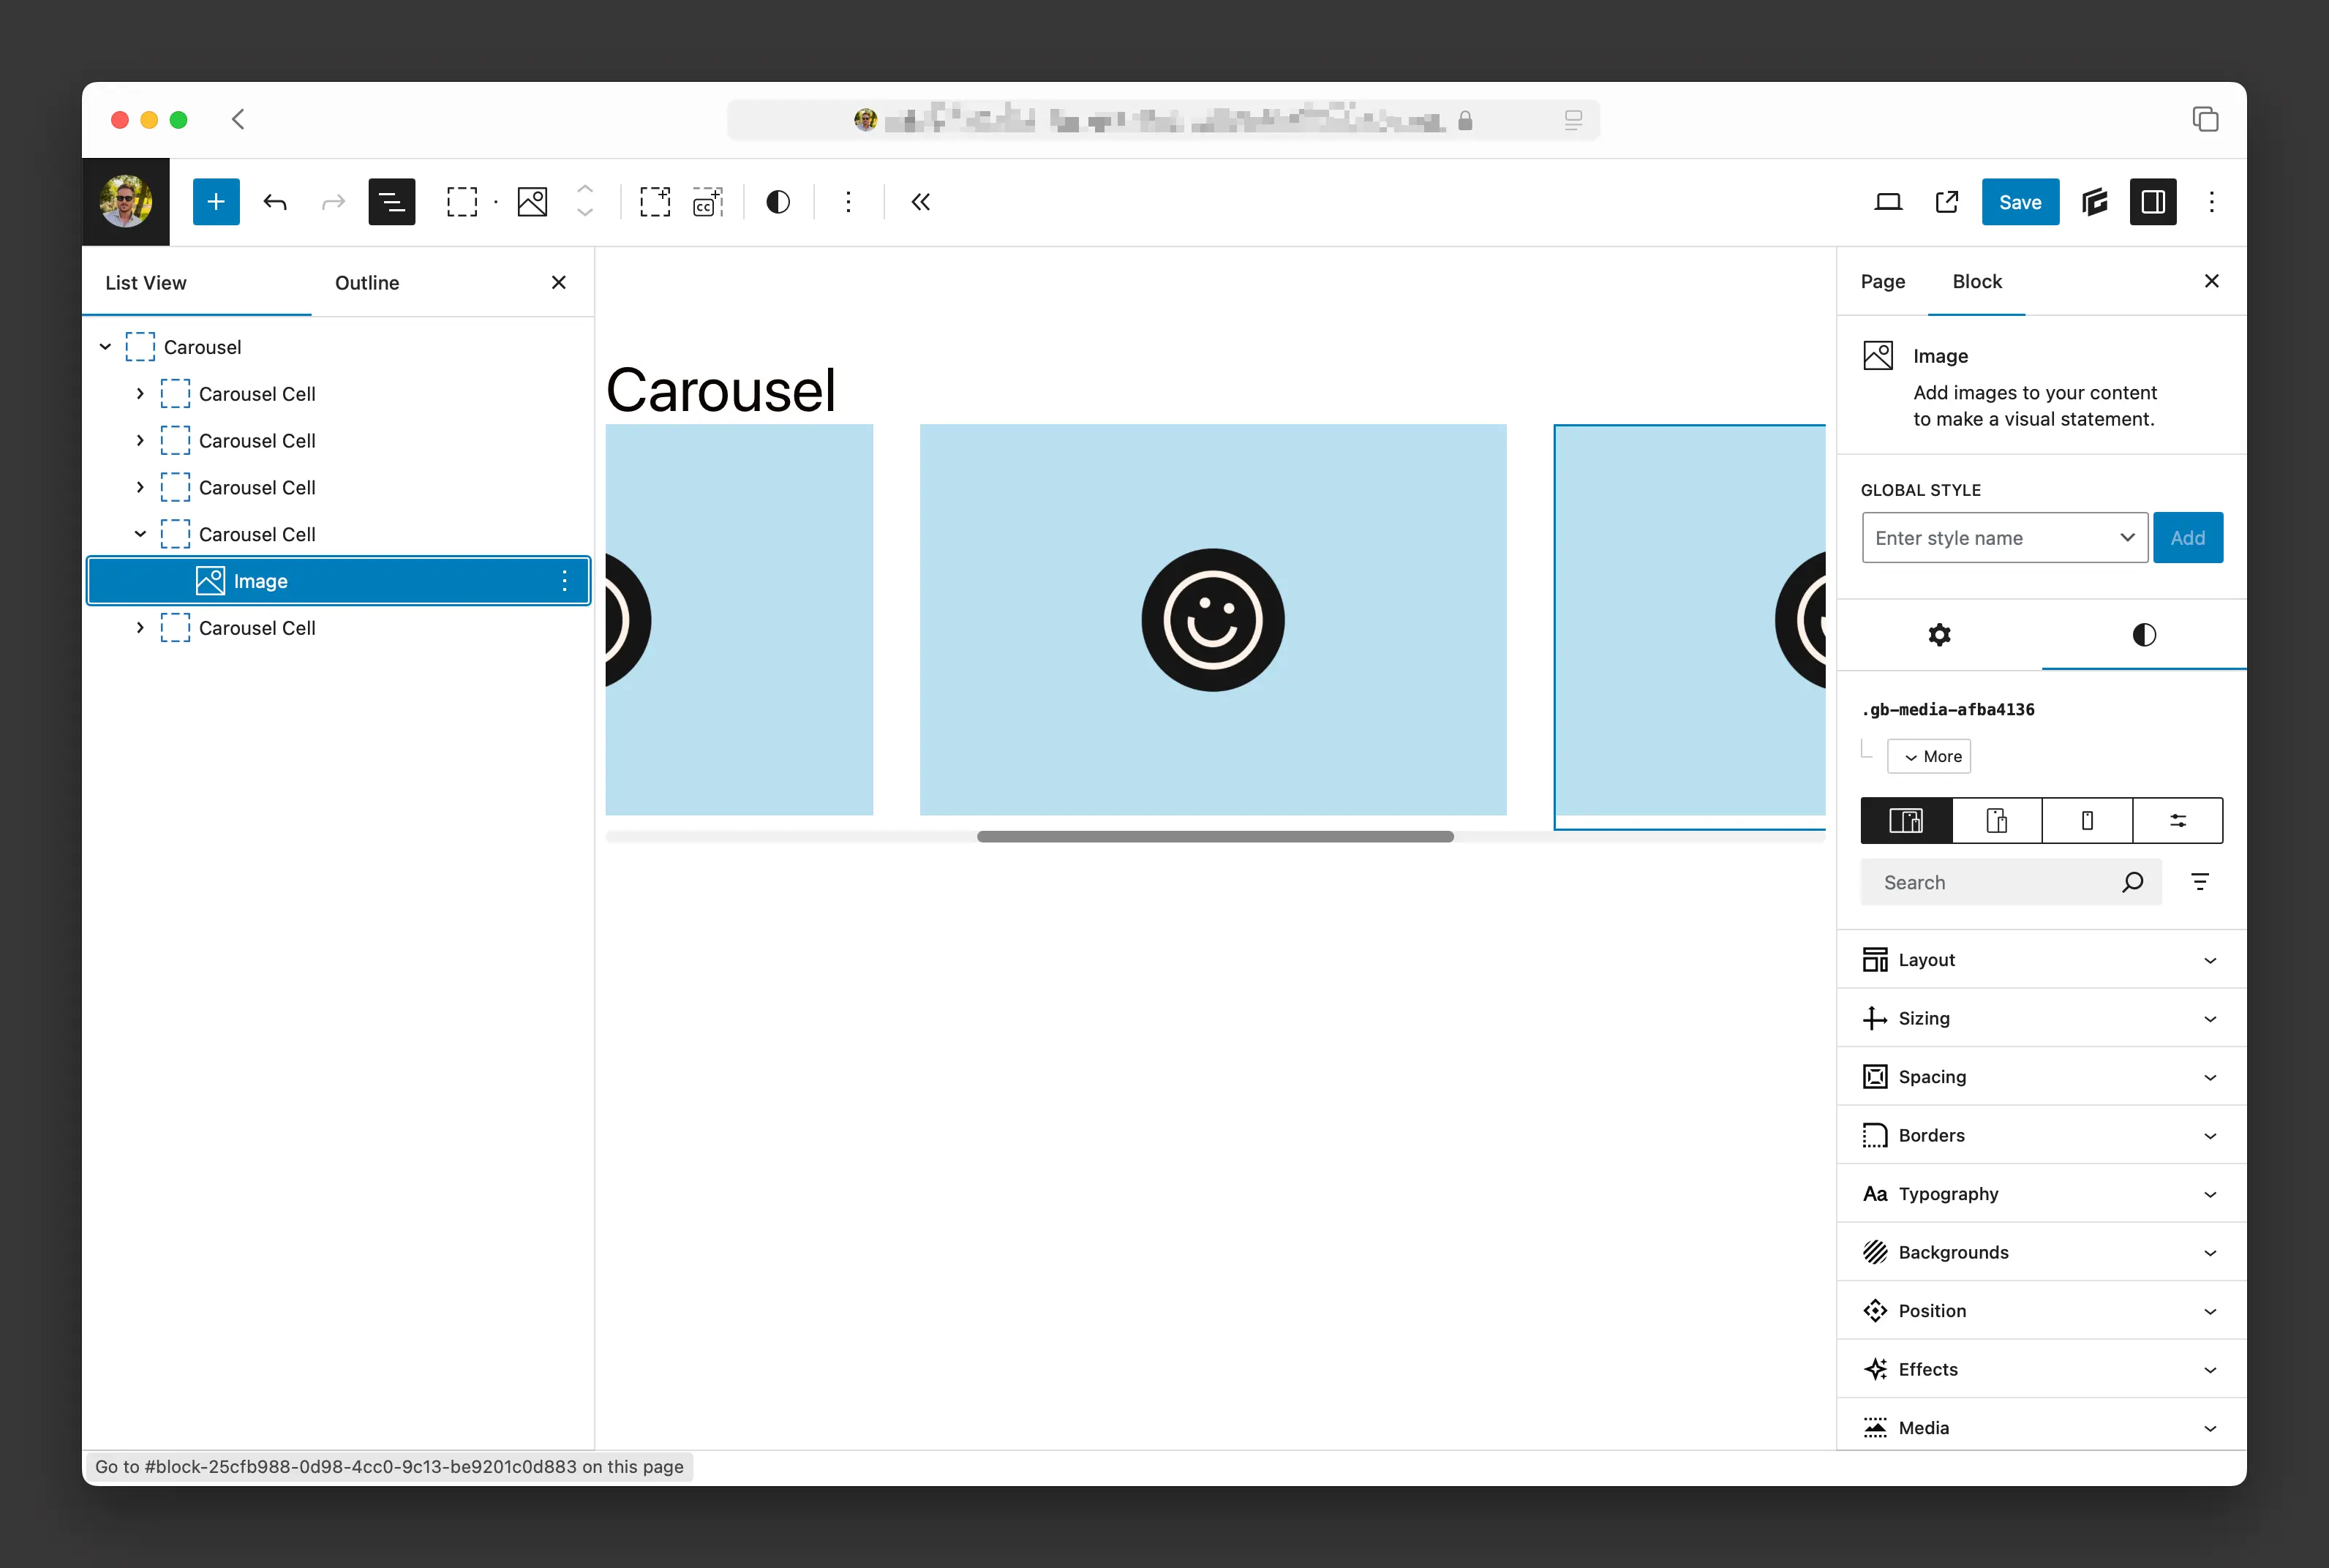
After adding some images or content into the carousel-cells and saving it, you should’ve built your first slider in GenerateBlocks, good job!
Simple Native GenerateBlocks Carousel Slider
Step 3 — Configure the Slider
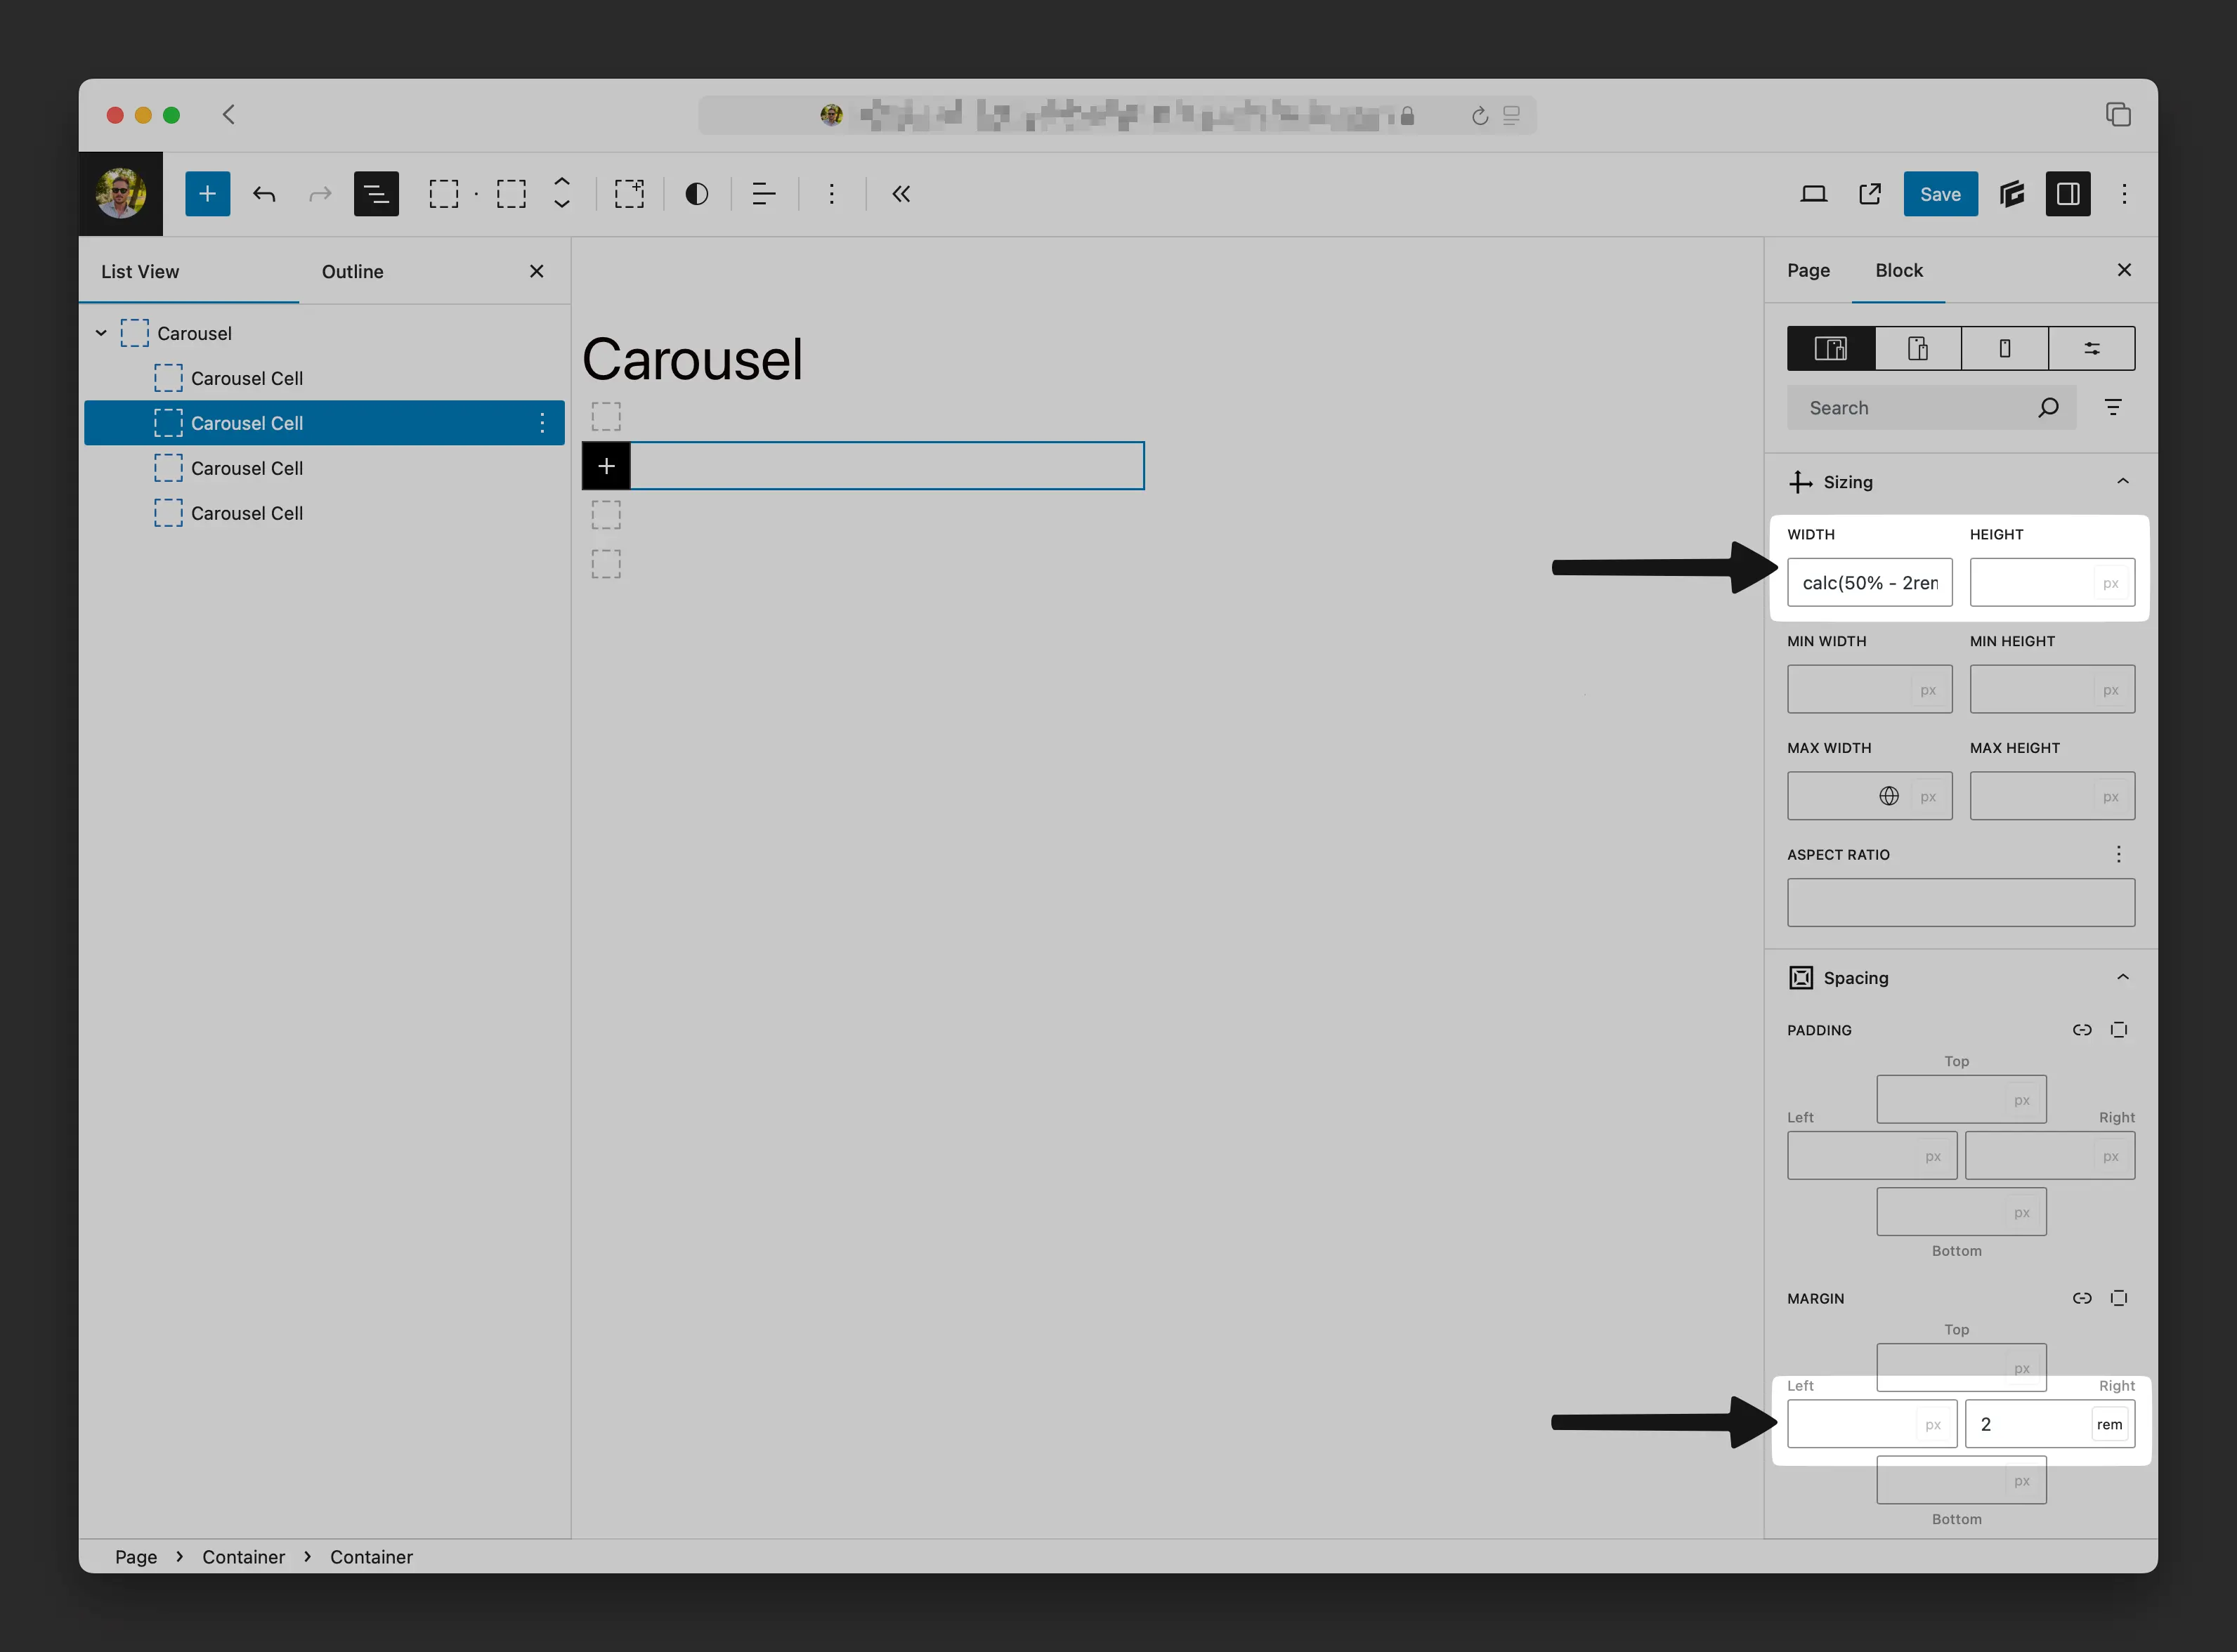
The carousel gaps and width are configured using the width and margin-right setting. To adjust these elements neatly inside the container, I use calculations that thankfully work perfectly in GenerateBlocks.
/* For 2 cells with 2rem gap */
.carousel-cell {
  width: calc(50% - 2rem * 1/2);
  margin-right: 2rem;
}

/* For 3 cells with 1rem gap */
.carousel-cell {
  width: calc(33.333% - 1rem * 2/3);
  margin-right: 1rem;
}
You could use a var(--gap) for a more advanced approach, but we’re focusing on simplicity in this tutorial.

In the following carousel example, we’ve disabled the navigation buttons using prevNextButtons, enabled infinite looping with wrapAround, and set the first cell to align left using cellAlign. These three options give us a smooth, continuously scrolling carousel without manual navigation controls.
/* Infinite Carousel without Navigation Buttons */
data-flickity={ "cellAlign": "left", "prevNextButtons": false, "wrapAround": true }
..and a slider without pagination
/* Slider without Pagination */
data-flickity={ "cellAlign": "left", "contain": true, "groupCells": true, "wrapAround": false, "pageDots": false }
You’ll find more available configuration options at the end of this article, or you can dive deeper in Flickity’s documentation.
Infinite Carousel without Navigation


3 Column Slider without Pagination


Step 4 — Customize the Styling
I use some custom styling for the pagination and navigation buttons on these examples. You can add these CSS styles directly to the Customizers custom CSS to adjust the appearance of your slider.
/* Pagination */
.flickity-page-dots {
    width: 100%;
    bottom: -1.5rem;
    padding: 0;
    margin: 0;
    display: flex;
    flex-direction: row;
    justify-content: center;
    gap: 0.5rem;
}

.flickity-page-dots .dot {
    width: 0.5rem;
    height: 0.5rem;
    margin: 0;
    background: #000;
}

/* Navigation */
.flickity-button{
    height: 2.5rem;
    width: 2.5rem;
    background: none;
    color: #000;
}

.flickity-button:hover{
    background: none;
}

.flickity-prev-next-button.previous{
    left: 0;
    transform: translateX(-3.5rem) translateY(-50%);
}

.flickity-prev-next-button.next{
    right: 0;
    transform: translateX(3.5rem) translateY(-50%);
}
Additional Configuration Options
Here are some other configuration options you can add to control how your carousel behaves. Add them directly to your data attributes, or if you prefer, in a separate JavaScript file. You can find a detailed documentation at flickity.metafizzy.co.
accessibility: true,
// enable keyboard navigation, pressing left & right keys

adaptiveHeight: false,
// set carousel height to the selected slide

autoPlay: false,
// advances to the next cell
// if true, default is 3 seconds
// or set time between advances in milliseconds
// i.e. 'autoPlay': 1000 will advance every 1 second

cellAlign: 'center',
// alignment of cells, 'center', 'left', or 'right'
// or a decimal 0-1, 0 is beginning (left) of container, 1 is end (right)

cellSelector: undefined,
// specify selector for cell elements

contain: false,
// will contain cells to container
// so no excess scroll at beginning or end
// has no effect if wrapAround is enabled

draggable: '>1',
// enables dragging & flicking
// if at least 2 cells

dragThreshold: 3,
// number of pixels a user must scroll horizontally to start dragging
// increase to allow more room for vertical scroll for touch devices

freeScroll: false,
// enables content to be freely scrolled and flicked
// without aligning cells

friction: 0.2,
// smaller number = easier to flick farther

groupCells: false,
// group cells together in slides

initialIndex: 0,
// zero-based index of the initial selected cell

lazyLoad: true,
// enable lazy-loading images
// set img data-flickity-lazyload="src.jpg"
// set to number to load images adjacent cells

percentPosition: true,
// sets positioning in percent values, rather than pixels
// Enable if items have percent widths

prevNextButtons: true,
// creates and enables buttons to click to previous & next cells

pageDots: true,
// create and enable page dots

resize: true,
// listens to window resize events to adjust size & positions

wrapAround: false
// at end of cells, wraps-around to first for infinite scrolling
The Query Block in GenerateBlocks 2
This carousel setup works seamlessly with the Query Block introduced in GenerateBlocks 2.0. If you’re using GB’s Query Block element to display posts or custom content, just add the data-flickity attribute and .carousel class to your Looper Block, and the .carousel-cell class to your Loop Item Block and that’s it.
Boom — instant dynamic carousel for anything you throw at it! Blog post carousels, WooCommerce product carousels, testimonial sliders, team members carousels… all without the bulk of another plugin.
Bonus: Better Block Editor Experience
If you want to go the extra mile, add this little snippet to your code or child theme’s functions.php file to get a more organized view of your carousel in the backend. Note that you need to adjust the class to match the outer container you use for the carousel (in my case .carousel).

function flickity_editor_style() {
    $custom_css = "
    .block-editor-block-list__layout .carousel {
        display: flex;
        overflow-x: auto;
        flex-wrap: nowrap;
    }
    .block-editor-block-list__layout .carousel > div {
        flex: 0 0 auto;
    }
    ";
    wp_add_inline_style('wp-edit-blocks', $custom_css);
}
add_action('enqueue_block_editor_assets', 'flickity_editor_style');
Conclusion
There you have it – simple sliders and carousels built directly in GenerateBlocks containers. No need to wait for a dedicated GB carousel element or install another WordPress plugin. Just two container blocks, some data attributes, and you’ve got a solution that’s as flexible as any slider plugin but integrates naturally with your GenerateBlocks workflow.
Maybe I’ll do GSAP x GenerateBlocks animations next, because it’s just as simple and I see a lot of these questions as well.
Looking for a performance-obsessed WordPress freelancer to turn this kind of custom expertise into your next enterprise-grade site? You can hire me today.